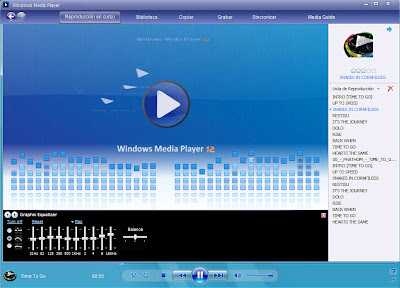
Designed by media lovers, for media lovers. Windows Media Player 12—available only in Windows 7—plays more music and video than ever, including Flip Video and unprotected songs from your iTunes library!
But, Sometime when we try to play a .mp3 or .avi or anything of the sort with Windows Media Player, it says "Server execution failed." This problem may happened due to the following resion.
•WMP may not be set up correctly and may not run as expected. WMP may have to run the first time setup to correct settings.
•The settings for WM network streaming may be corrupted. This prevents streaming video or audio from playing.
 •WMP Library may be corrupted. This causes media browsing and search problems in WMP.
•Nero Video Burning Plugin is incompatible with WMP 11 or newer versions, and may cause WMP11 or newer to crash or stop responding.
•WMP 11 does not start, or some UI elements are blank.
•CD/DVD player is not working with WMP.
•Unable to install WMP 10 or 11.
•Videos are displaying "PICVideo M-JPEG 3, www.accusoft.com" or "PICVIDEO, WWW.JPG.COM" overlay.
We can fix this issue, by running a Microsoft Fix-it. This Fix-it, automatically repairs Windows Media Player problems when the player doesn’t start, streaming doesn’t work or when you cannot browse or search for media. Just click the following link to fix the problem automatically.
1. http://go.microsoft.com/?linkid=9760161
2. http://support.microsoft.com/mats/windows_media_player_diagnostic
If you are interested to repeair the problem manually please follow the given method. i don't say it may fix the problem but try one by one.
Method 1
1. Close Windows Media Player and any other windows.
2. Click Start, All Programs, Accessories.
3.Open Command Prompt as Administrator (Click Start, Type cmd, right Click Command Prompt, select Run as Administrator)
4.Type regsvr32 jscript.dll and press enter.
5.Now type regsvr32 vbscript.dll and press enter again.
6.Close Command Prompt and try opening the file again!
Method 2
1. Click the Start Button, choose Default Program in the right pane.
2. Choose Set your default programs.
3. Click Windows Media Player in the Programs pane.
4. Click Set this program as default, and then click Choose default for this program.
Method 3
1. Close Windows Media Player.
2. Click the Start Button, type "%userprofile%\appdata\local\Microsoft\Windows Media" (without quotation marks) in the Search Box and press Enter.
3. In the open folder, right-click the folder 12.0 and choose Rename. Rename the folder to 12.0.bak.
Method 4
1. Click Start Button, type "cmd" in the search bar. The CMD icon will appear in the Start Menu.
2. Right click the CMD icon and click "Run as administrator".
3. In the popup window, type the following command line and press Enter.
NET LOCALGROUP administrators "NT Authority\Local Service" /ADD
You should receive a message “The command completed successfully”.
Method 5
1. Click the Start Button, type "services.msc" (without quotes) in Start Search box, and press Enter.
2. Double click the service "Windows Media Player Network Sharing Service".
3. Click on the "General" tab; make sure the "Startup Type" is "Automatic" or "Manual". Then please click the "Start" button under "Service Status" to start the service.
4. Click OK.
Method 6
1 Right click "Computer"
2 Click "Manage"
3 Under the "System Tools" section, Double click "Local Users and Groups"
4 Click "Groups"
5 Right click "Administrators"
6 Click "Add to group..."
7 Click "Add"
8 Click "Advanced"
9 Click "Find Now"
10 Double click "Local Service"
11 Click "Ok"
12 "NT Authority\Local Service" should show up in the list now
13 Click "Ok"
14 Close Computer Management and reboot.
Method 7
1. Start the computer by using the current Operating System.
2. Insert the Windows 7 DVD in the computer's DVD drive.
3. Use one of the following procedures, as appropriate:
If Windows automatically detects the DVD, the Install now screen appears. Click Install now.
If Windows does not automatically detect the DVD, follow these steps:
a. Click the Start Button, type Drive:\setup.exe in the start search box and then click OK.
Note: Drive is the drive letter of the computer's DVD drive.
b. Click Install now.
4. When you reach the "Which type of installation do you want?" screen, click Upgrade

Comments
Post a Comment